Create and Send Notifications
With your push provider credentials successfully connected to AppAmbit, you can now create, schedule, and send push notifications to the devices registered in your application.
This guide explains the complete flow for Android, along with the structure for the upcoming iOS implementation.
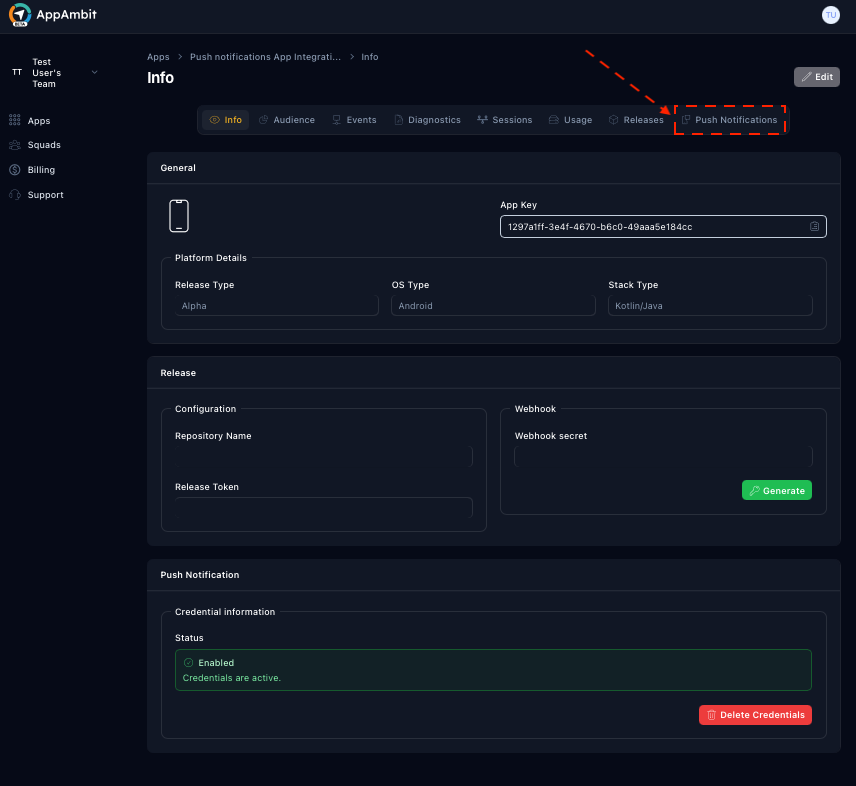
Navigate to the Push Notifications view
- Open your AppAmbit Dashboard.
- In the top navigation bar, select
Push Notifications.
You will be taken to the Push Notifications section, where you can list, create, and send notifications to your app’s devices.

Creating a New Notification
In the Push Notifications view:
- Click the Create Notification button located in the upper-right corner.
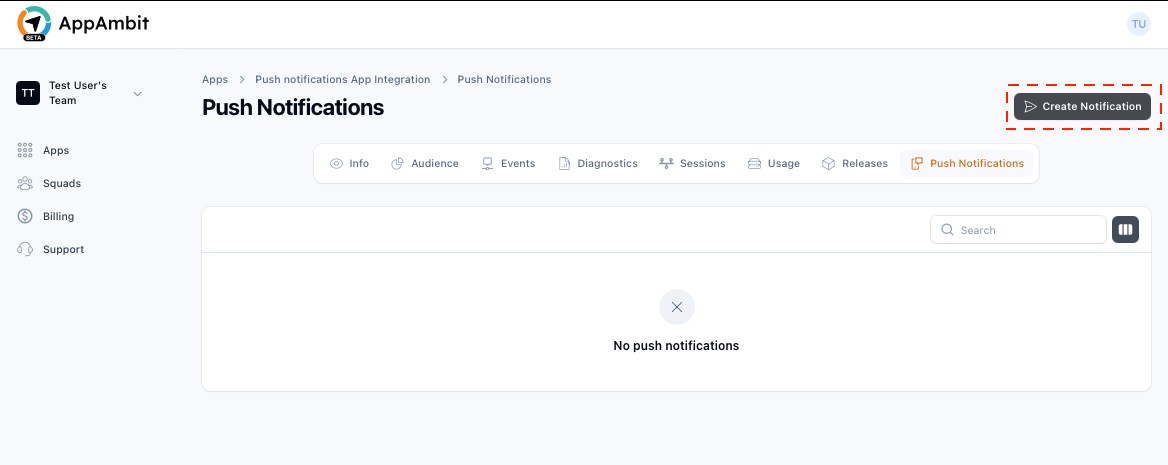
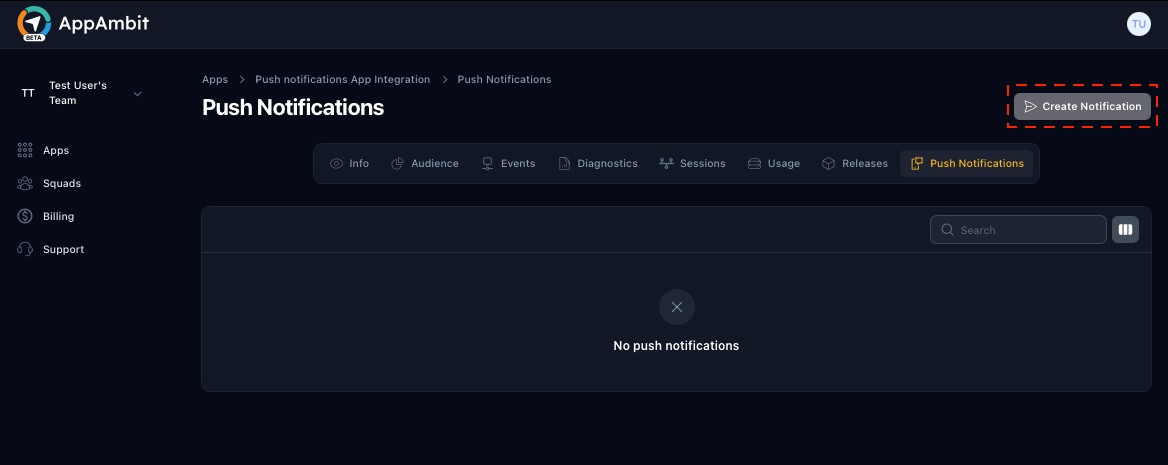
This opens the notification creation form where you can configure all details of the notification.

Android Notifications
Below is the full process for creating and sending notifications to Android devices using Firebase Cloud Messaging (FCM).
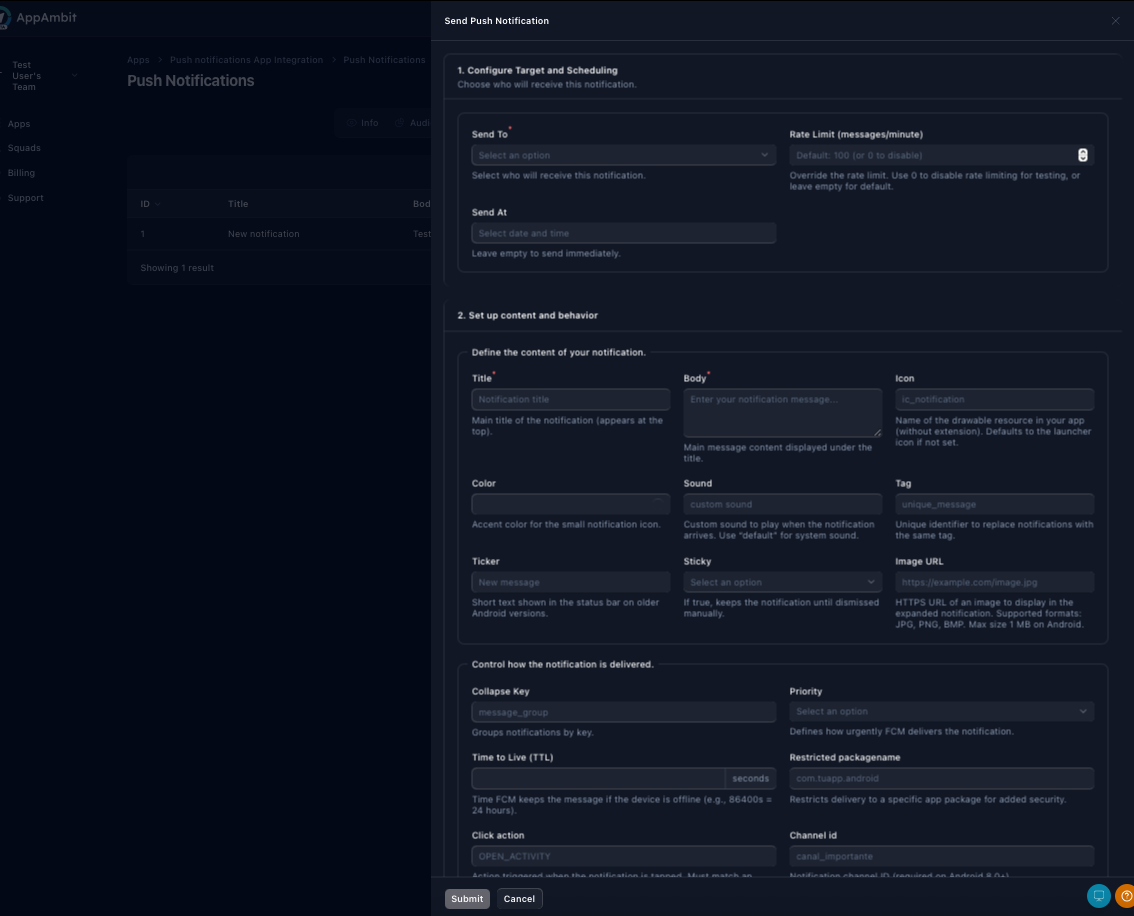
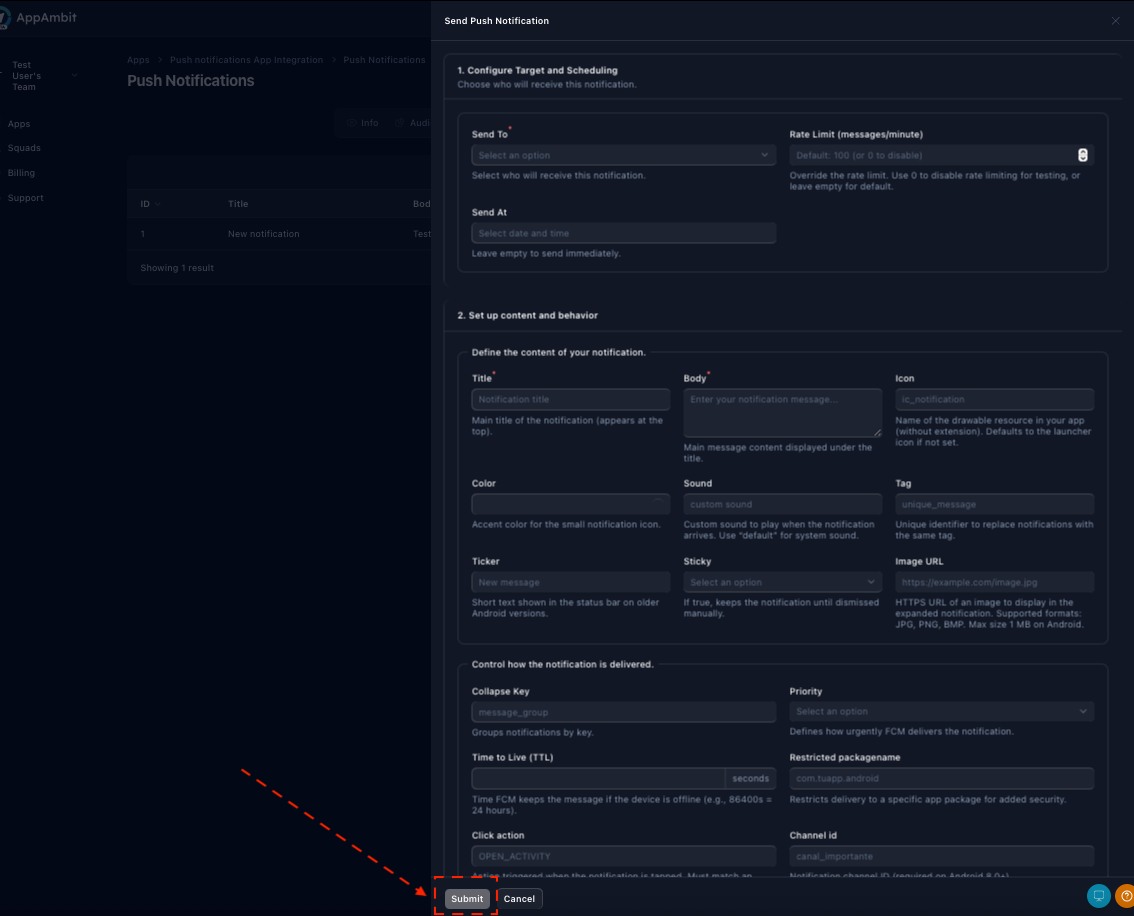
Step 1: Target and Scheduling
In the Target and Scheduling section, you will configure how the notification should be delivered.
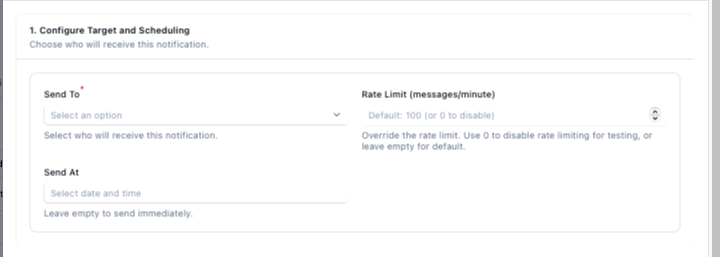

Send To (Target)
Choose the target audience for your notification:
- All App Users
- User segment
- Custom Audience
- Specific Device Token
Rate Limit (Optional)
Define how many messages may be sent per minute, allowing you to throttle delivery if desired.
If left empty, all messages are sent immediately without rate limiting.
Send At (Scheduling)
Schedule the notification for a future date/time.
- Leaving this field empty will send the notification immediately.
About the fields
About FCM Fields (Steps 2 and 3)
If you want to understand in detail how each field works inside an FCM notification payload, you can review the official Firebase documentation.
This is useful when you need deeper clarification about how Android handles notification parameters, message behaviors, or delivery logic.
You can consult the official documentation here:
Step 2: Content
This section defines the message to be displayed on the user’s device.

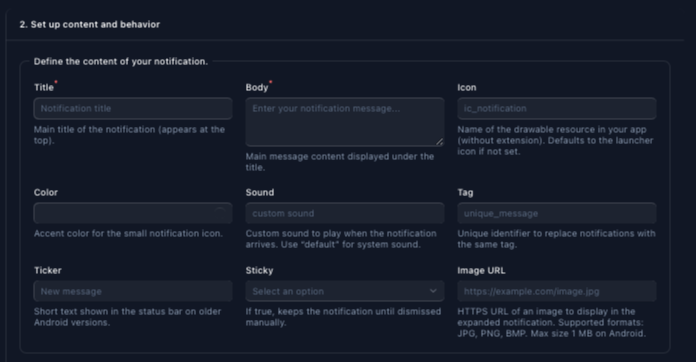
Required fields:
- Title
- Body
Optional fields:
These fields will only be included in the request if they are filled out:
- Icon
- Color
- Sound
- Tag
- Ticker
- Sticky
- Image URL
These allow you to customize the appearance and behavior of the notification on Android devices.
Step 3: Behavior Options
This section governs how FCM should handle the delivery under various system conditions.

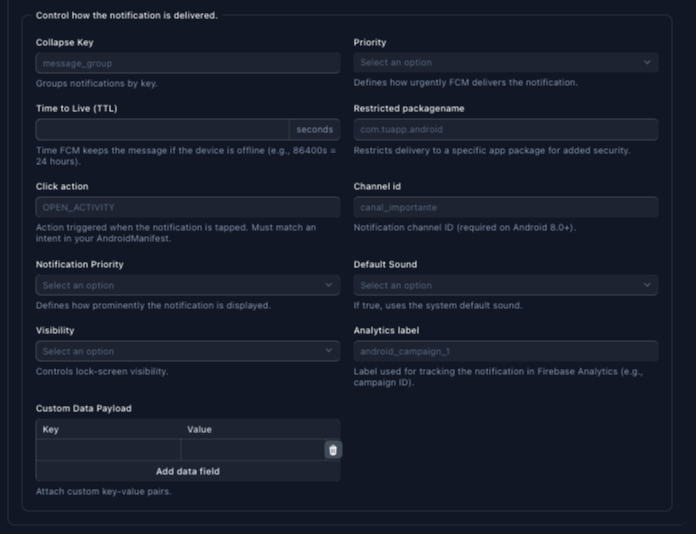
Optional configuration fields:
These fields will only be included in the request if they are filled out:
- Collapse Key
- Priority
- Time To Live (TTL)
- Restricted Package Name
- Click Action
- Channel ID
- Notification Priority
- Default Sound
- Visibility
- Analytics Label
- Custom Data (key-value pairs sent along with the notification payload)
These options control message routing, display rules, analytics tagging, and advanced delivery behaviors.
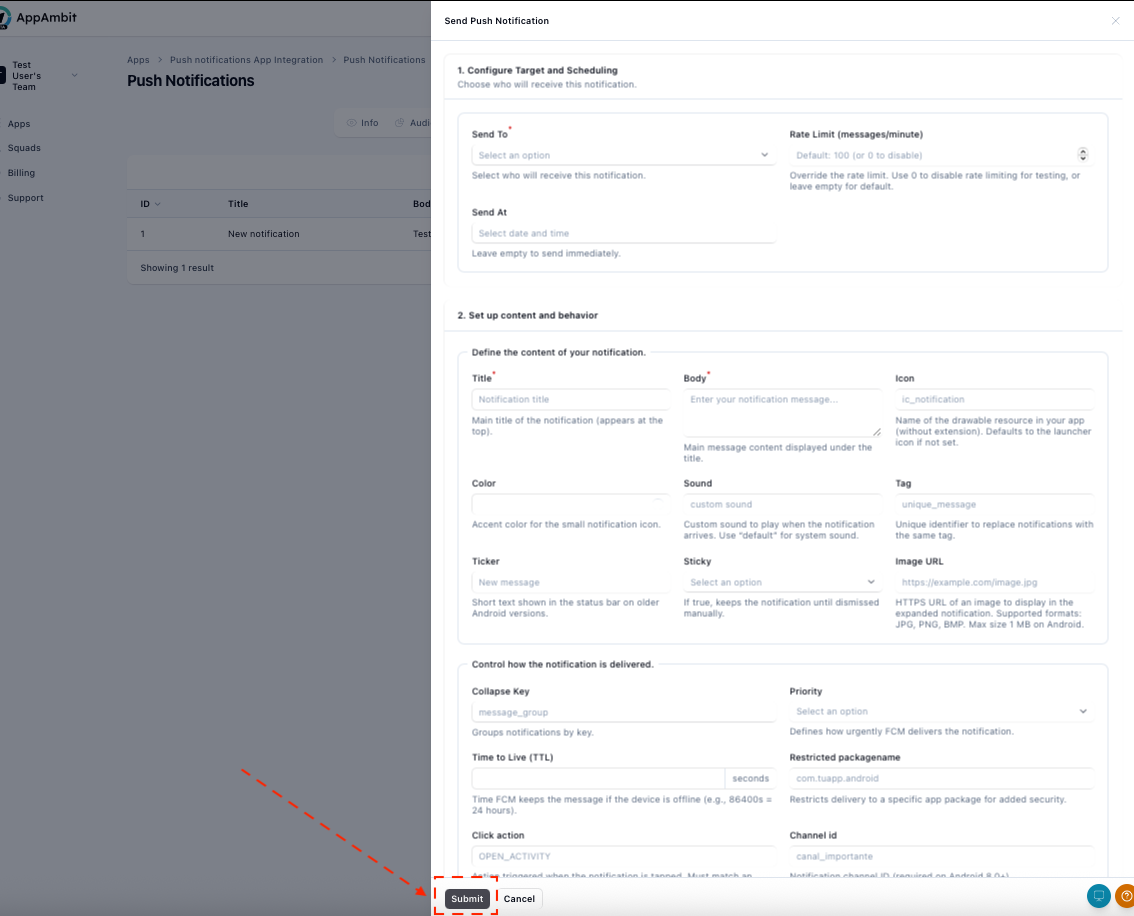
Step 4: Send the Notification
Once all required and optional fields have been completed:
- Click Submit.
- AppAmbit will automatically use your validated Firebase credentials to send the notification.
- FCM will process and deliver the message to your targeted devices.
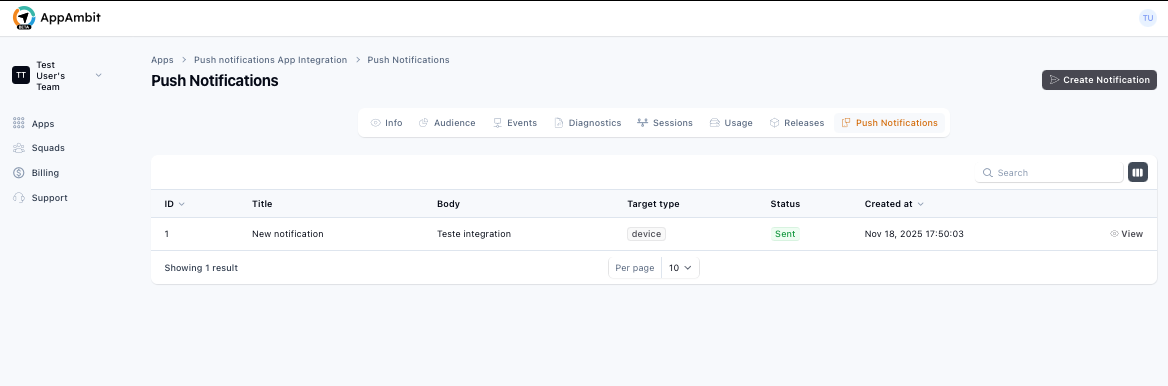
Step 5: View Sent Notifications
After sending your notification, you will be returned to the Push Notifications list.
Here you can review the details of your send, including:
- Notification title
- Delivery status
- Send date and time
- Type (immediate or scheduled)
iOS Notifications (Coming Soon)
Congratulations
Your push notification workflow is now complete.
👉 Return to:
Getting Started to review again the workflow.
Summary
You have now learned how to create, configure, schedule, and send push notifications from AppAmbit using your connected provider credentials.
These steps complete the Android notification workflow, with iOS support on the way.