Push to AppAmbit
This document outlines the Continuous Integration and Continuous Deployment (CI/CD) process. It details how repositories from providers like GitHub, Bitbucket, or Azure integrate with the AppAmbit Dashboard to automate the delivery of application artifacts.
Setup your Build first
Before pushing a build, make sure your CI/CD environment is properly configured. Need help setting that up? Start with the Build Setup guide.
The Core Process
The CI/CD integration follows a streamlined, provider-agnostic workflow.
Automated Workflow Steps
- Trigger & Build: A push to the repository triggers a pipeline, which builds the source code and generates a
.zipartifact containing the new version. - Webhook Notification: Upon successful build, the pipeline sends a secure notification (a webhook) to the AppAmbit Dashboard.
- Processing & Release: The dashboard receives the notification, processes the artifact, extracts key build information, and creates a new entry in the
Releasesview, making it ready for distribution.
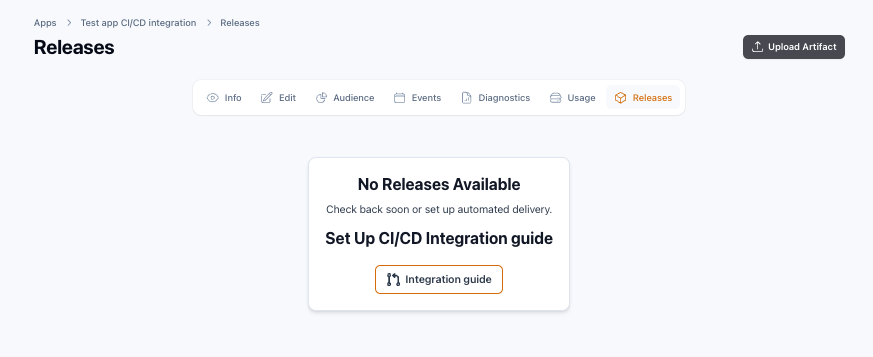
The Releases Section
The Releases section is the central hub for all your builds. Once a pipeline successfully delivers an artifact, a new record will appear here with the following information:
Securing Your Webhooks
To ensure the AppAmbit Dashboard only accepts requests from your trusted repositories, we use a Webhook Secret. This secret acts as a password that your CI/CD provider must present with every webhook request.
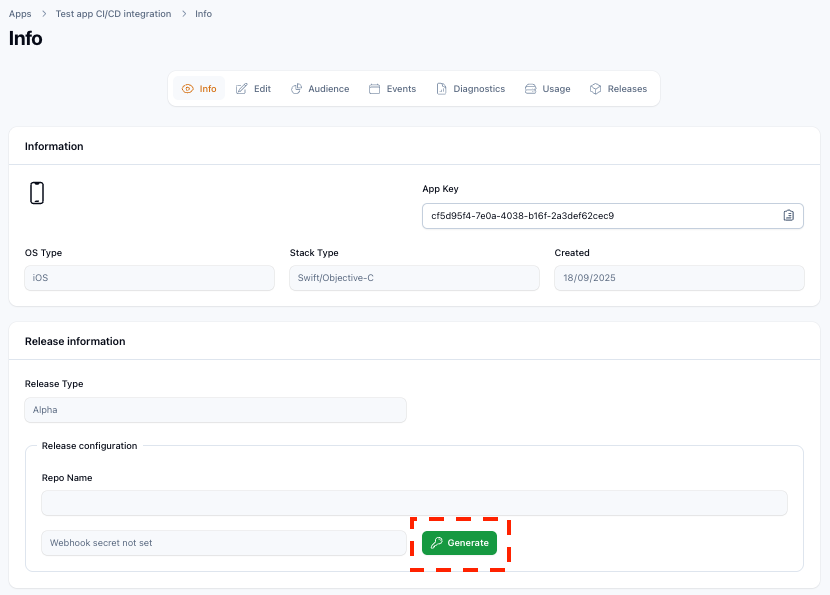
Generating the Webhook Secret
You must generate this secret from the AppAmbit Dashboard.
- Navigate to the App you want to configure.
- In the "View App" section, find and click the Generate webhook secret button.
- A unique, secure secret key will be generated for you.
Important: Save Your Secret
Copy this secret immediately and store it in a safe place. You will need it to configure the webhook in GitHub, Bitbucket, or Azure. For security reasons, the secret will only be shown once.
App Workflow
This section describes the workflow for using CI/CD in the application.
- Go to the
Releasesview. No records will be loaded initially. - In the
Editview, fill in:- Repo name (no extra spaces, correct syntax)
- Delivery token (the Personal Access Token you generated)
- Click
Save changesto allow the app to access your repository. - When a GitHub Actions workflow is triggered, the integration process begins. Artifacts are generated and processed by the app.
Artifact Details: - Branch (workflow trigger branch) - Date (workflow execution timestamp) - User (who triggered the workflow) - Workflow URL (direct link) - Files section (downloadable artifacts) - Send button (send files to users)
Clicking Send opens a panel to select users. After submitting, selected users receive an email with the artifacts.
Artifact Naming and Loading
Info
Artifacts generated by your CI/CD workflows must use the correct file extension for the selected platform. The system validates only the extension, since artifact routing is based on the app_key.
| Platform | Extension | Example Filename |
|---|---|---|
| Android | .apk | anyname.apk |
| iOS | .ipa | anyname.ipa |
| Windows | .msix | anyname.msix |
| MacOS | .dmg | anyname.dmg |
| tvOS | .ipa | anyname.ipa |
- Filenames can be chosen freely.
- Artifacts not following the expected pattern may not be loaded or displayed in the app.
Now that you understand the general process, you can proceed to the specific guide for your service provider to configure the integration:
- Manual Integration Guide
- GitHub Integration Guide
- Bitbucket Integration Guide
- Azure DevOps Integration Guide